THE ARRAN BOATS BLOG
Original Arran 16 Diesel rebuild Yanmar 1GM10
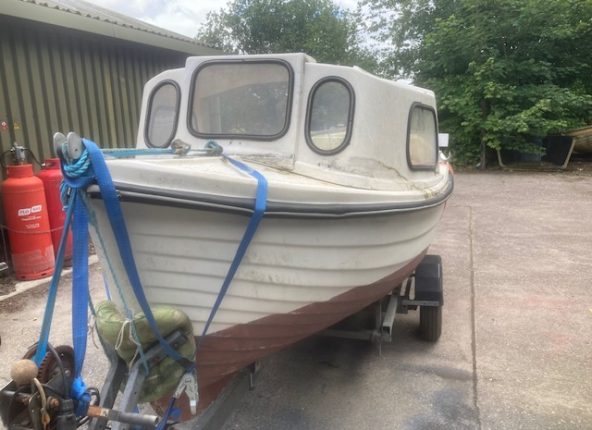

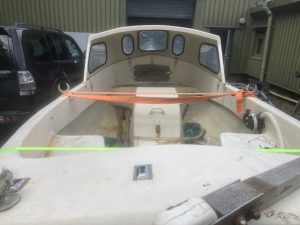
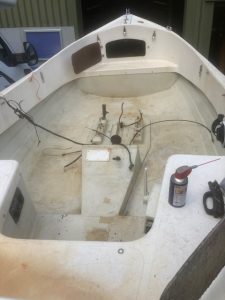
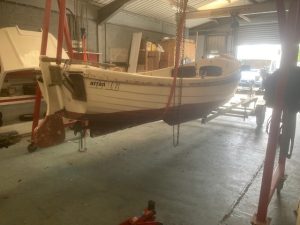
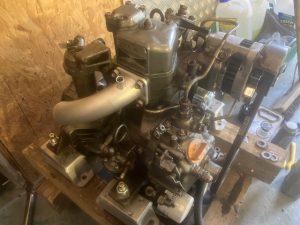
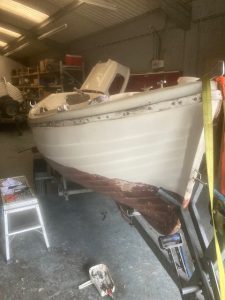
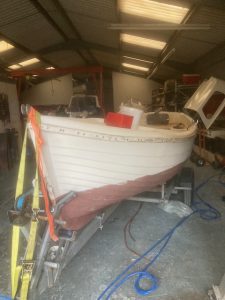
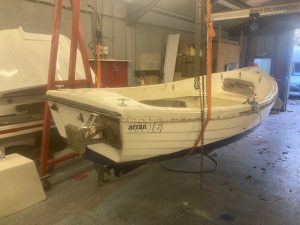
This is an original Arran 16 diesel inboard boat fitted with a Yanmar 1GM10.The owner has asked me to refurbish both the boat and the engine so before you ask it is not for sale.
The engine has not run in 6-7years and I would have written it off due to water damage and replaced it but I found antifreeze in the water system.This will have protected the core plugs and the internal passageways from freezing.
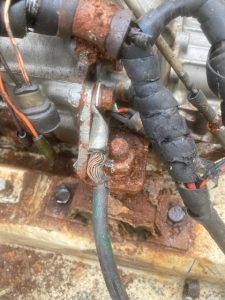
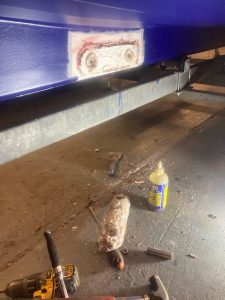
As can be seen the engine mounts are heavily rusted and the rubber mounts have split away so are useless.I will be replacing them with a new set of 4 made by R&D which look different to the Yanmar mounts but are cheaper yet are dimensionally the same.This is vital to avoid redrilling and tapping the floor bolts.

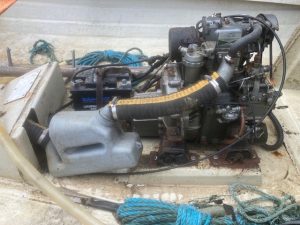

Once the engine mounts were unbolted from the beds it was a matter of unbolting the prop shaft coupling, cutting the fuel lines which had become inflexible and undoing the wiring loom.The water intake hose was unclipped and the engine hoisted out.

I unbolted the thermostat housing and although the thermostat opened when placed in hot water it was rusted and will be replaced.The water passages from the pump to the thermostat are clean and unobstructed.I will check the water passages from the housing to the exhaust elbow to see if they are blocked.
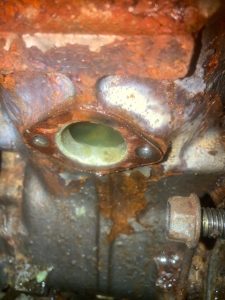
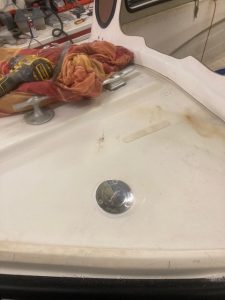
The anode is hidden behind a cover plate and was well corroded so it will be replaced also.
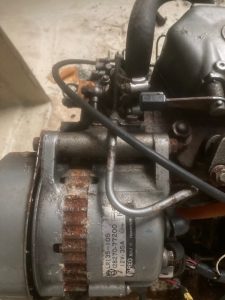
The alternator is seized solid and will be replaced.I have wired the solenoid and starter motor up direct to a 12v supply and while they work I will replace these also.The boat needs to be a reliable starter so for the cost of replacing its not worth the grief of a dodgy starter motor.
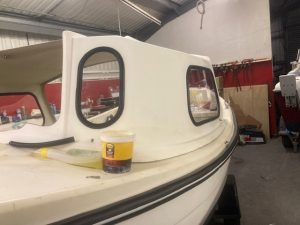
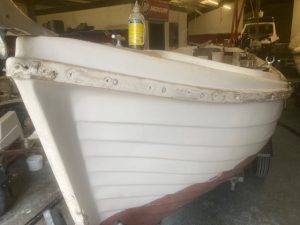
As regards work required on the boat it needs cleaning, new keel bands, new antifoul, new fendering, new windows and rubbers plus whatever else I find.The brief is not to make it a gin palace but a useable boat.
I got the cover plate of the water pump and the passages are relatively clean but the impeller will be replaced.The boat was also given a quick power wash to get the thick of the dirt off it.
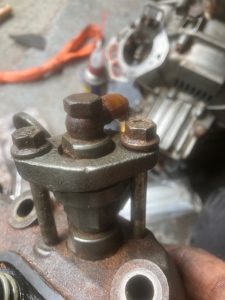
I removed the oil feed pipe to the head and the fuel supply pipe running from the high pressure fuel pump to the injector.Once the two nuts were removed holding the injector inplace it came away without a fight.There is one nut holding the rocker cover on and the cover and rockers were very clean.
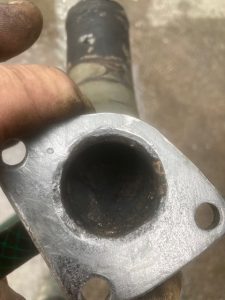
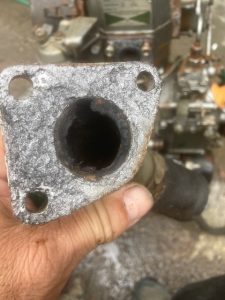
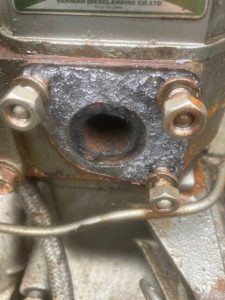
The exhaust elbow was removed as its held in place by three nuts.As you can see the gasket has split but I needed to check the exhaust elbow itself.Its got a tube fitted within it so the inlet cooling water can only run downwards out the exhaust pipe for several inches cooling the exhaust.
These tend to rust and can be checked by turning it upside down putting your finger over the water inlet hole and filling the space between the two pipes with water.It should not be able to drain away but mine did loosing approx half the water which means there’s a hole in the internal pipe wall and therefore knackered.You cant get in to repair it but they do a replacement upgraded version in stainless steel.
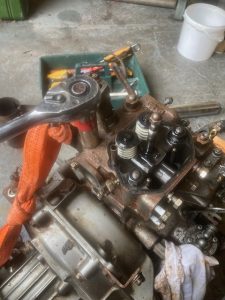
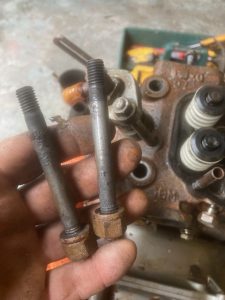
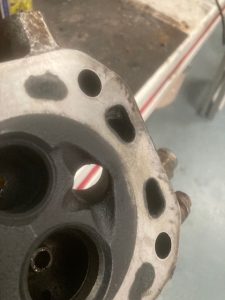
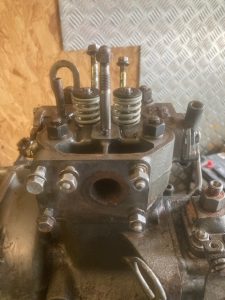
The above right pic shows me removing the 4 cylinder head bolts in order 1/4 turn at a time until loose.As you can see two of the studs came out with the nuts but its not a problem.
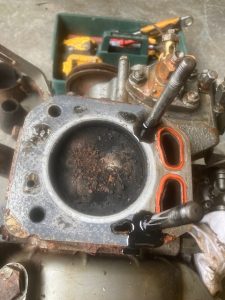
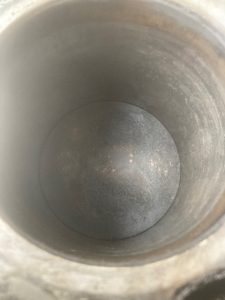
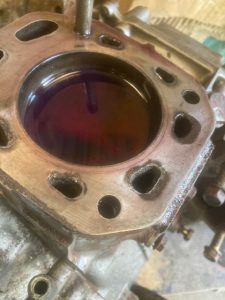
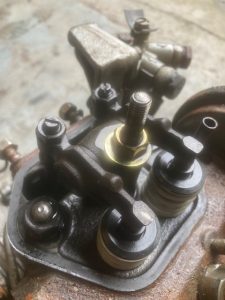
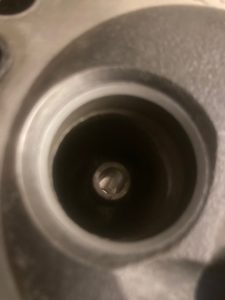
The gasket was in good shape showing no obvious leaks and the cylinder bore was in excellent condition I couldn’t feel any ridges or gouges out of it.I gave the piston top a quick hoover and clean before popping some oil ontop of it.Its sat there for three days without the lever dropping at all.
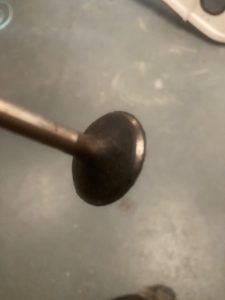
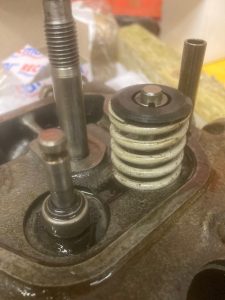
The valves were removed with a spring compressor and will be cleaned along with the cylinder head before re-bedding but they are in very good condition.
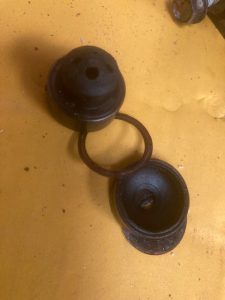
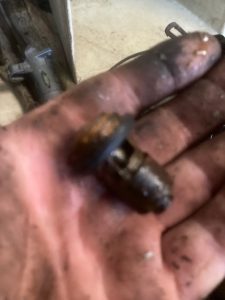
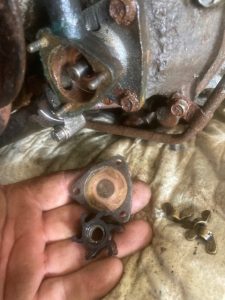
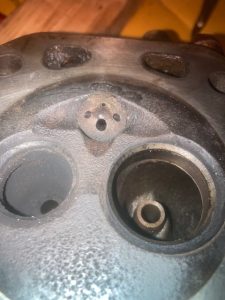
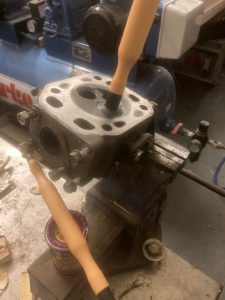
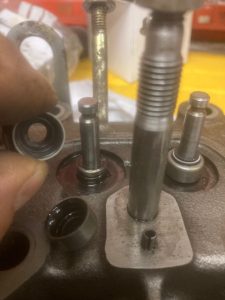
Having got this far into the job I wanted to check the pre combustion chamber which sits between the cylinder head and the injector.Mine looked rusted in place so I applied some heat to it with a blow torch.
It took a quick couple of taps with a hammer and a block of hardwood so as not to damage it to get it to come out.
The washers look like they need replacing but other than that a good clean will do it.
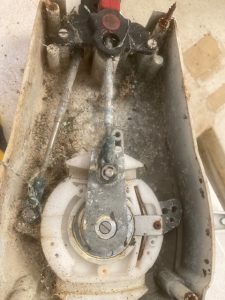
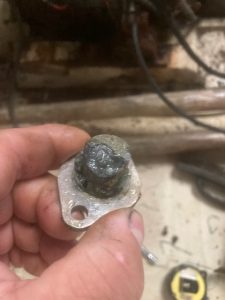
The pics above show the control box which as can be seen is heavily corroded. I couldn’t get the screws off so it was levered off by force and you can see how much sand and corrosion fell out of it.Its an expensive item to replace but I might have no choice if it cant be cleaned.Even the mounting holes are full of the old rusted screws.
I had a go at the control box today and despite getting some of the screws out its overall condition is poor due to corrosion and even if I got it fully apart its life expectancy is short.
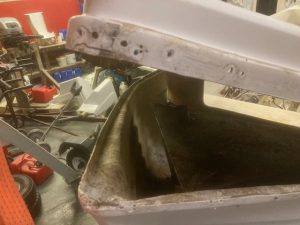
Hit a problem today with the fuel tank which is fixed in the bow of the boat in the storage locker.I need to get it out to replace the fuel lines and also to see if its rusted inside.The return diesel line is on top and right at the bow but the feed is completely out of sight I presume lower down the tank.Its fibre glassed in along the bottom of the front edge which was easily cut away.The problem is a single screw which I cant get to as the tank was fitted during construction of the boat.The screw holds a bracket fixed to the tank firmly in place.Even if I got the screw out the tank wont come out as its larger than the exit hole.
I have taken one out before but it involved splitting the top deck of the boat from the bow backer towards the stern until I could flex it enough to get the tank out.As the fendering needs replacing anyway half the rivets holding the deck on will be drilled out during that process.

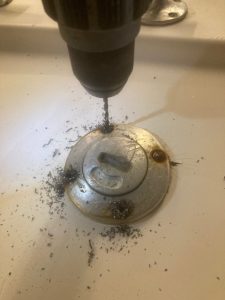
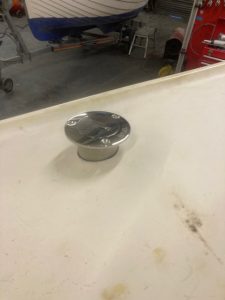
I also drilled out the rusty old bolts holding the filler cap in place.These will be replaced with stainless bolts.
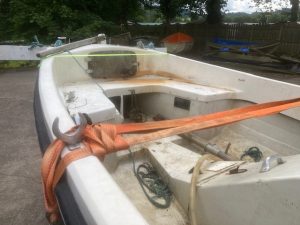
Today I bit the bullet and went to get the tank out.As the fendering is brittle and ripped its getting replaced anyway so that was removed first.
I then drilled all the rivets heads off using a 5mm drill and pushed the rest of the rivets back and out the fibreglass.Once this was done back to the rear seat I attached a hoist to the bow roller.
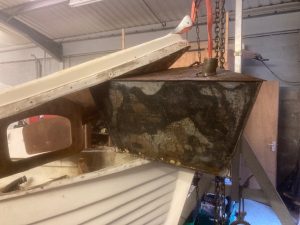
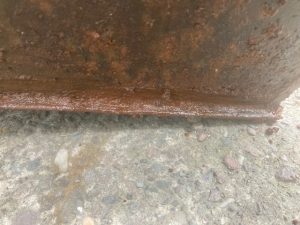
Once the top ring was lifted high enough I cut the fuel lines and got the tank out.Its rusted inside and out with diesel weeping out a bottom joint.

The tank could get cleaned inside and out and an attempt made to reseal it but why?. It will never be as good as a modern plastic version and cost more to fix than to replace with future internal rust still an issue.
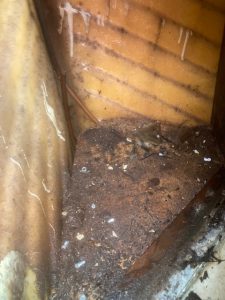
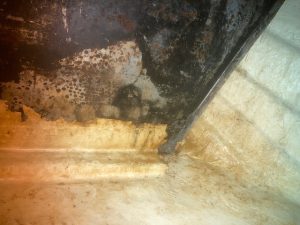
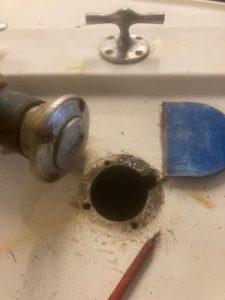
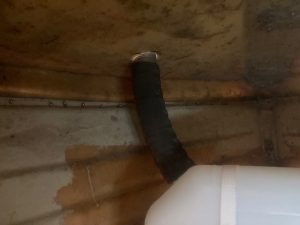
The above pic shows where the tank was removed from with the two fuel lines coming up into the bow having followed the length of the keel from the front of the engine to the bow.I will need to use the old pipes to pull the new ones through the same route.
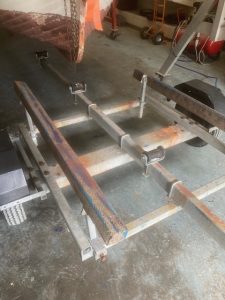
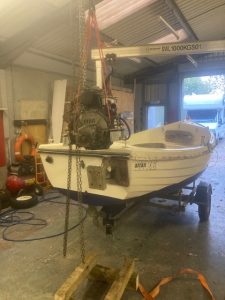
The boat was stern heavy when it was sat on the trailer making the nose weight too little.I first had to fit a new bow U bolt before lifting it up and sliding the trailer out so it could be adjusted.The axle is fixed via three U bolts so I slackened them off and moved the axle backwards approx 12″.It may need further adjustment when the engine and cuddy are back in the boat but it prevents it from tipping up when working on it.
I have started to bed the two valves into the seats in the cylinder head using a course and fine grinding paste.The inlet valve is smaller than the exhaust so I cant get mixed up with which one goes where.
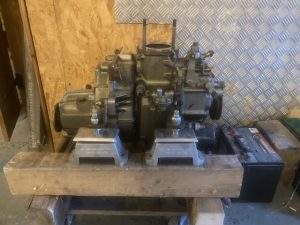
The engine has been placed on a wooden bed using the new engine mounts.I will assemble it out the boat and test it before refitting.
I got bored on Sunday so went and did a few hours in the workshop reassembling the engine.
I put new oil seals on the valves before using the spring compressor to refit the valves.I used plenty of oil to lubricate the job for when it first fires up.
I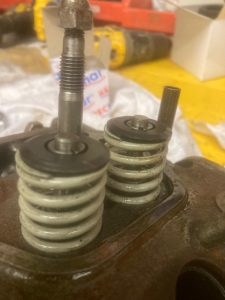
The cylinder head was replaced using a new gasket and torqued down to 75n/m in three equal stages.The rocker assembly was added torqued down and the gap on the rockers set to 0.2mm.
The rocker cover and exhaust elbow were put back on and I blew the oil lines and fuel lines I had removed clear before refitting them.
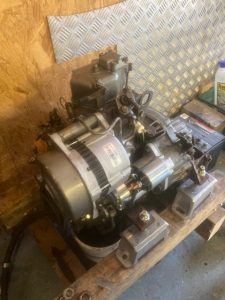
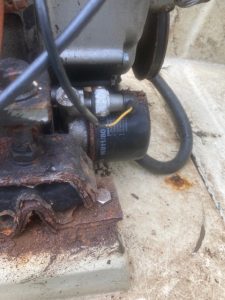
On went the new starter motor and alternator with a new anode and thermostat.The temp sensor which was broken was replaced.I put the new filter in the air filter and then removed the oil filter.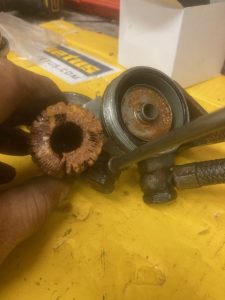

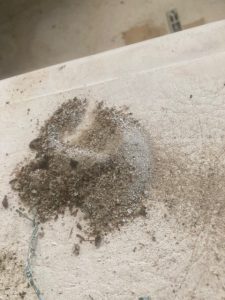
As you can see from the sludge on the rag it was choked full of rubbish.I cleaned it out before adding a new paper filter and refitting it.I should be able to rig it up shortly on the test bed to see if it will run.Due to the state of the fuel filter I pulled the fuel lift pump top off and cleaned it.
I connected a fuel supply up and a battery earth to ground on the engine case.Next was a live to the solenoid main supply and a second small wire to the solenoid activator via a push button switch and a 20amp inline fuse.Water was supplied via a hose and a long length of exhaust pipe put the water and fumes outside the workshop.Having bled the diesel fuel lines all the way to the fuel injector it was the moment of truth.
It starts and runs straight away and I have left it running on several occasions for 20mins to make sure I am happy with it.
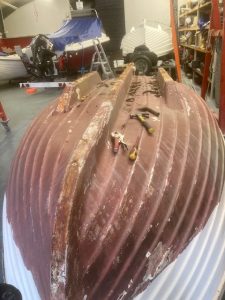
The next step is to get the boat flipped over, the antifoul removed and new keel bands put on on.It first needed the top deck riveting back on which I have just done.
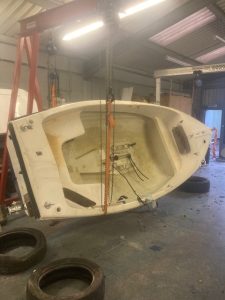
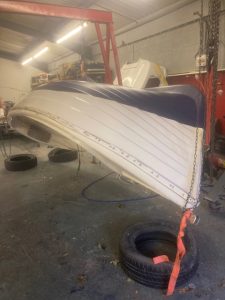
I flipped the boat over and took the remaining bits of rusty keel bands off it.The old antifoul needs to be removed by scraping and sanding it off.Its going to take a while so I will just do a bit at a time.
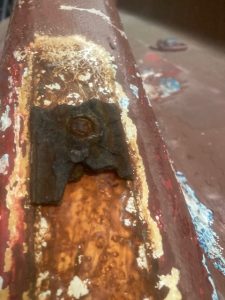
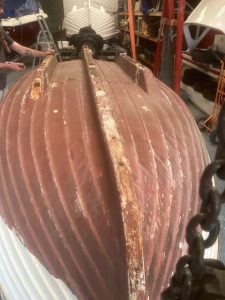
The large anode on the keel is corroded more than 1/3 so I will replace it.I have access to the nuts on the outside but the bolts are turning so I will need access to the inside bottom of the keel to get a spanner on the bolt heads.
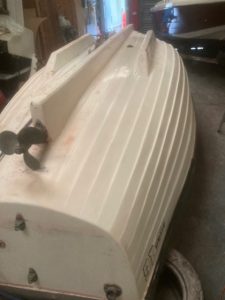
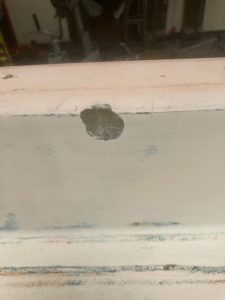
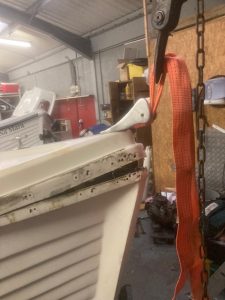
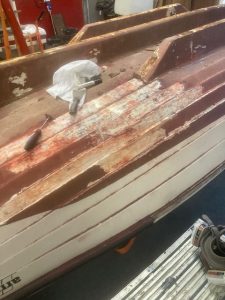
I had power washed the antifoul but it made little effect so I then used a scraper to remove the majority of it over a week doing a portion at a time.Next came the DA air powered sander on the flat sections of the hull.The last process was to hand sand the curved section of the chines to remove the last of it.As can be seen it revealed quite a few sections of damage which will need to be filled.
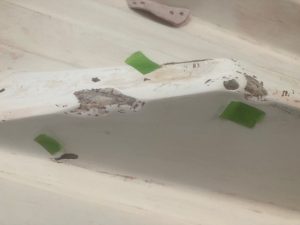
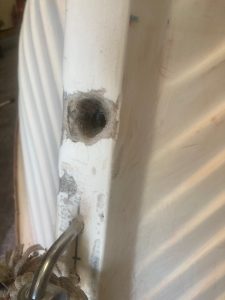
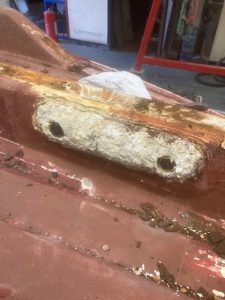
I used a small grinding bit in the drill to remove the antifoul out of the damaged areas so the filler will get a good grip rather than been just stuck to old paint.The large hole at the bow is where the old with bolt was fitted.It will be glassed in and filled over.
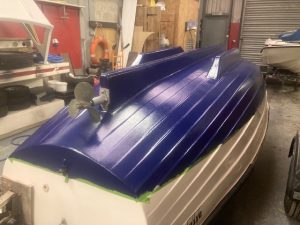
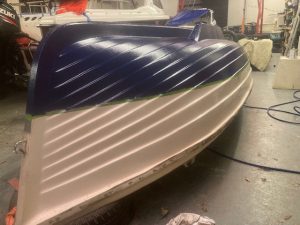

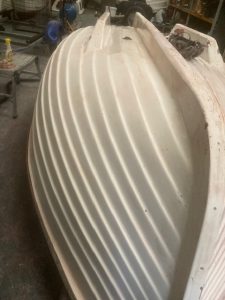
Thats the hull anti fouled with a primer and two top coats of Hemple blue.I flipped it back over today and have popped the engine back in.
One of the engine mount bolts will not tighten up which is a real problem.I am looking at using a Helix repair fastener or re-drilling and tapping it with a larger drill and putting a larger bolt in the hole.
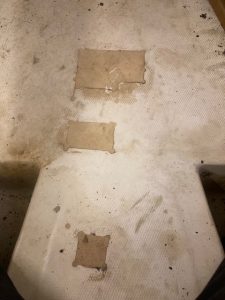
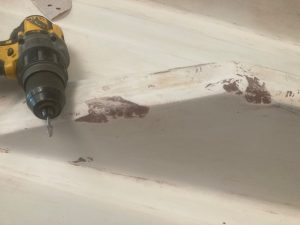
I have to get to the bolts which hold the old anode onto the centre keel.You can clearly see where someone has opened up the floor in the past to get to the bolts.I have cut out the larger previous access hole to get to the bolt from the inside.The nut and bolt are turning when I try to remove them from the outside.
I managed to get one of the bolts out but the other was just spinning even with both nuts removed from the inner keel.The only way to remove it was to drill down the bolt until the nut split and then drive the remaining bolt inwards.
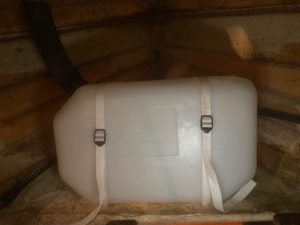
The original fuel tank has been replaced by a vetus plastic tank.It is strapped down in place and the filler pipe helps keep it in place also.I fitted another filler cap as the other one was on the starboard side and the vetus tank uses a port sided filler.
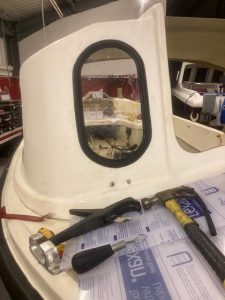
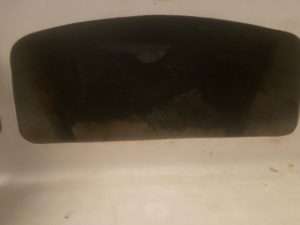
I have replaced the windows in the cuddy which is covered in other blogs.The hatch is going to need repairing or replacing as its been repaired several times in the past.